Preparations
You need at least a dozen pencils. For your first trials, choose classic and cheap pencils. However, avoid plastic pencils that cannot be used. Afterwards, if you like this technique, you will be able to acquire pencils of better quality but also more expensive.
Begin by cutting them. If by cutting them, close to the perfect point, your mine breaks, your pencil has undoubtedly slyly broken from the inside in its fall. To avoid these inconveniences, store your pencils in a metal box after use.
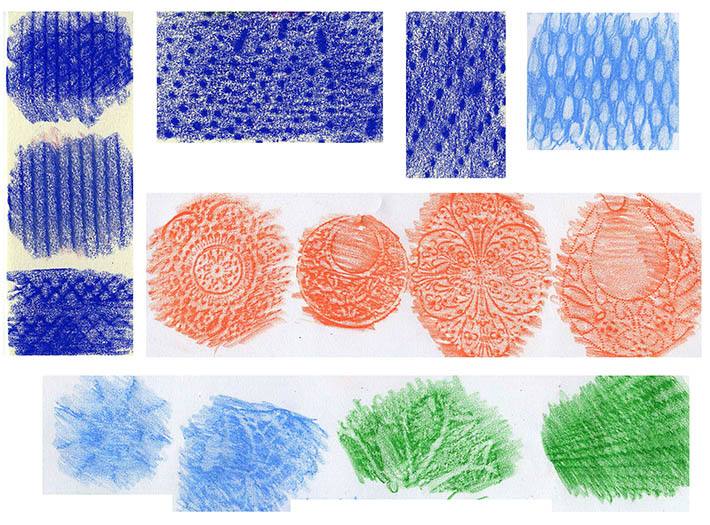
For paper, you can work both on totally smooth paper and on thick, granular media. It all depends on the desired effect.
The basics
When we look at the foliage of a tree, we are tempted to say that it is green. If we ignore the details, we are absolutely right. The leaves are green, and taken as a whole, the tree is actually frankly green. On closer inspection, we quickly find that other colors, such as blue, red, yellow, and other colors, due to the texture of the leaves, the origin and the quality of the light Still there.
All this to tell you whatever the motive, you will always use many colors that you will deposit in small touches.
In theory, no trace of a pencil should appear. On the same principle as the braces technique, you have to cross your lines many times.
Drawing with colored pencils: Step-by-step coloring
The Quick Sketch
In this first step, I use a black felt (Size 0.1) to draw a quick draft of the main objects of the landscape. Trees and hills are arranged quickly, my hand making small jumps to avoid a too rigid treaty.
Some colors
The first colors appear in this second stage. You notice that these are affixed delicately by a simple touch. Your pencil should slide on the sheet.
Remember that your paper can not tolerate successive layers eternally.
Red trees
It is well known, the trees are green, and the sky is blue and the trunks brown. Starting from this elementary principle, I apply red on the foliage, the meadow and even on the rocks.
Result your drawing is all red and very ugly!
Finally from the green
Let's take green and start applying colors closer to reality.
In this fourth step, I use almost all the colors I have: blue, orange, pink, various blue, etc.
More and more colors
Fifth step, the colors mix in small touches on the whole of the drawing. The color of the rocks is reinforced by an addition of orange, brown, red, yellow, etc.
The sky begins to take its bluish tint. The meadow on the front is colored with spots of yellow, orange and different greens.
The return of the felt
For the final stage, I take back my black felt. I gently retrace the interesting contours: hills, groves of trees, grass on the front, rocks.
Finally, I work with shadows and foliage. The bottom of the trees is thus more marked to highlight the volume of these.
It's your turn!
As usual, it's up to you to play now. Start by drawing an apple. A totally thrilling subject of study, but which has the merit of being richly colored and of presenting an interesting volume. Once finished, eat it, digest it and start again with another one.
Verdict
If you wish to draw natural landscapes, I advise you to read these issues. You will discover many examples step by step and a multitude of tips to learn how to draw trees, translate the volume of a mountain or even draw a path in perspective.
You need at least a dozen pencils. For your first trials, choose classic and cheap pencils. However, avoid plastic pencils that cannot be used. Afterwards, if you like this technique, you will be able to acquire pencils of better quality but also more expensive.
Begin by cutting them. If by cutting them, close to the perfect point, your mine breaks, your pencil has undoubtedly slyly broken from the inside in its fall. To avoid these inconveniences, store your pencils in a metal box after use.
For paper, you can work both on totally smooth paper and on thick, granular media. It all depends on the desired effect.
The basics
When we look at the foliage of a tree, we are tempted to say that it is green. If we ignore the details, we are absolutely right. The leaves are green, and taken as a whole, the tree is actually frankly green. On closer inspection, we quickly find that other colors, such as blue, red, yellow, and other colors, due to the texture of the leaves, the origin and the quality of the light Still there.
All this to tell you whatever the motive, you will always use many colors that you will deposit in small touches.
In theory, no trace of a pencil should appear. On the same principle as the braces technique, you have to cross your lines many times.
Drawing with colored pencils: Step-by-step coloring
The Quick Sketch
In this first step, I use a black felt (Size 0.1) to draw a quick draft of the main objects of the landscape. Trees and hills are arranged quickly, my hand making small jumps to avoid a too rigid treaty.
Some colors
The first colors appear in this second stage. You notice that these are affixed delicately by a simple touch. Your pencil should slide on the sheet.
Remember that your paper can not tolerate successive layers eternally.
Red trees
It is well known, the trees are green, and the sky is blue and the trunks brown. Starting from this elementary principle, I apply red on the foliage, the meadow and even on the rocks.
Result your drawing is all red and very ugly!
Finally from the green
Let's take green and start applying colors closer to reality.
In this fourth step, I use almost all the colors I have: blue, orange, pink, various blue, etc.
More and more colors
Fifth step, the colors mix in small touches on the whole of the drawing. The color of the rocks is reinforced by an addition of orange, brown, red, yellow, etc.
The sky begins to take its bluish tint. The meadow on the front is colored with spots of yellow, orange and different greens.
The return of the felt
For the final stage, I take back my black felt. I gently retrace the interesting contours: hills, groves of trees, grass on the front, rocks.
Finally, I work with shadows and foliage. The bottom of the trees is thus more marked to highlight the volume of these.
It's your turn!
As usual, it's up to you to play now. Start by drawing an apple. A totally thrilling subject of study, but which has the merit of being richly colored and of presenting an interesting volume. Once finished, eat it, digest it and start again with another one.
Verdict
If you wish to draw natural landscapes, I advise you to read these issues. You will discover many examples step by step and a multitude of tips to learn how to draw trees, translate the volume of a mountain or even draw a path in perspective.
